

You open your bank app, see a charge you don't remember approving, and the fix is usually simpler than the stress makes it feel. On iPhone, how do you cancel a subscription on iPhone comes down to finding the right Apple account, opening the subscription list, and tapping the cancel control before the next renewal lands.
The part often missed is this, cancellation on iPhone is usually a self-serve Apple flow, not a support-ticket marathon. If the charge was billed through Apple, you can handle it on the device. If it wasn't, Apple won't be the place to end it.
The Fastest Way to Cancel a Subscription on iPhone
The fastest route is this: open Settings > your name > Subscriptions, tap the subscription, tap Cancel Subscription, and confirm. Apple’s current support flow still uses that exact path on iPhone, and Apple notes you may need to scroll to find the button; if the button is gone or you see an expiration message in red, the subscription is already canceled according to Apple’s iPhone subscription guide.
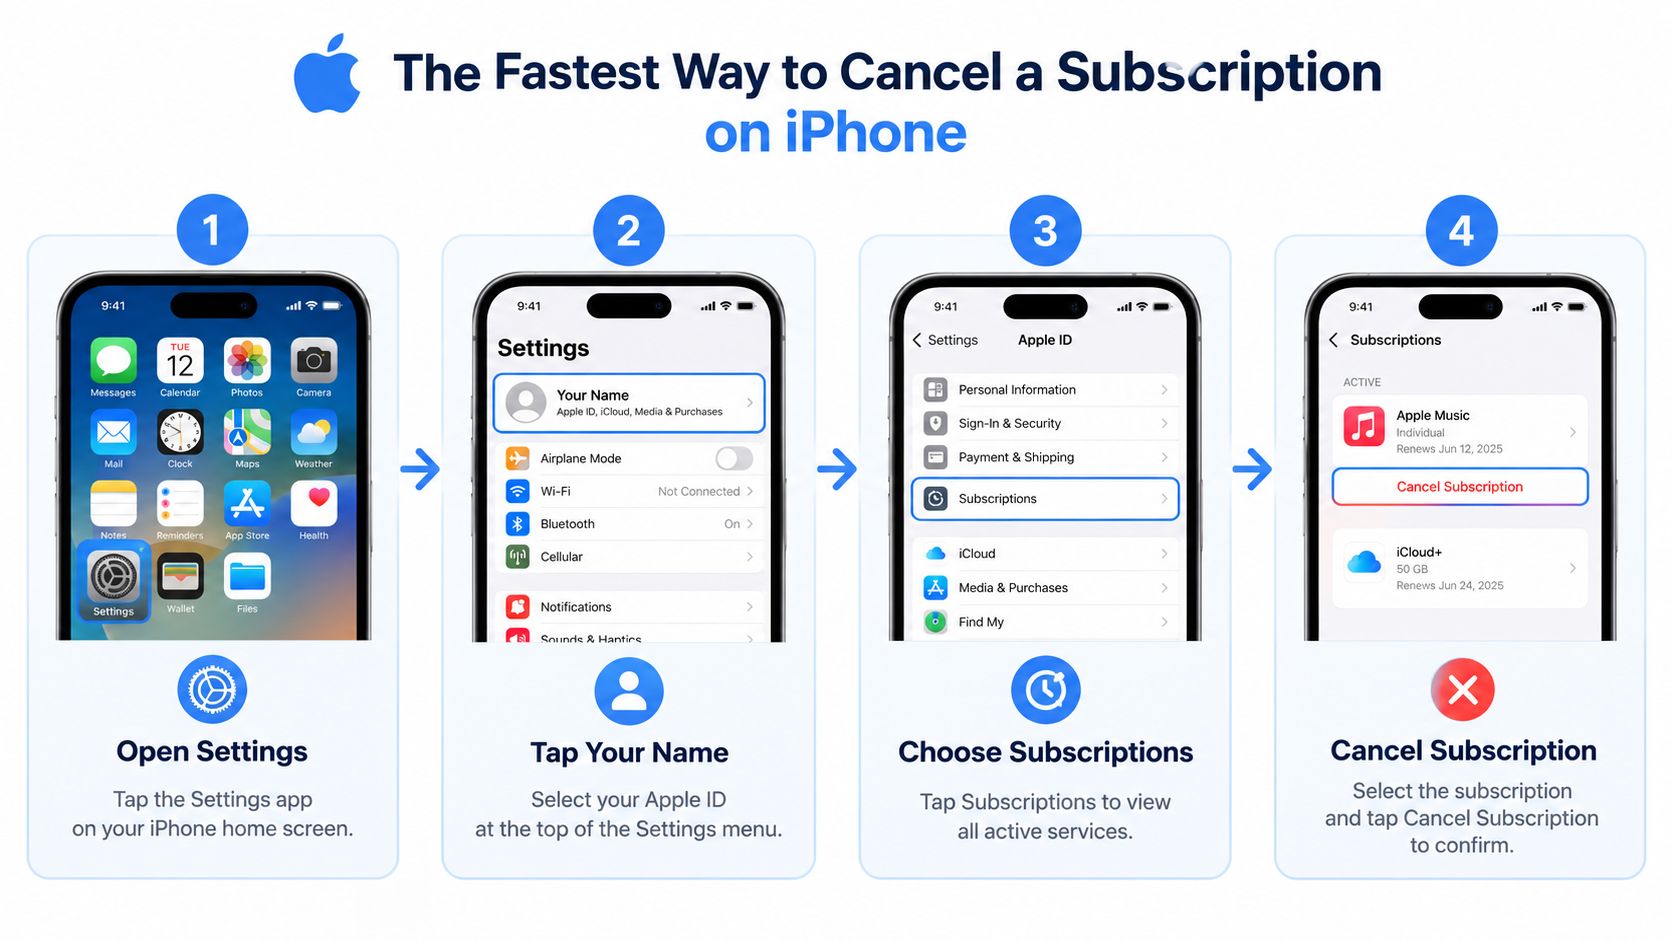
- Open Settings.
- Tap your name at the top.
- Tap Subscriptions.
- Choose the active subscription.
- Tap Cancel Subscription.
- Confirm the cancellation.
If you prefer, the alternate path is App Store > profile icon > Subscriptions > choose the plan > Cancel Subscription. In my review of Apple’s current flows, the Settings route is still the fastest in practice because it avoids hunting through the app itself or bouncing between account screens. This only works for subscriptions billed by Apple; if the merchant charged you directly, you need that company’s billing page instead. For a broader cleanup checklist beyond Apple’s menu, AccountShare has a useful walkthrough on canceling unwanted subscriptions.
Practical rule: after you cancel, Apple often shows an expiration date. That means the subscription stops renewing, but access usually continues until the current billing period ends.
Canceling Through Settings Step by Step
Use Settings when you want the most direct Apple-owned path. Start with Settings, tap your name, then tap Subscriptions. Apple keeps Apple-billed plans in that list whether they started from the App Store or from an in-app purchase, as long as Apple handled the billing.
From there, follow this sequence carefully:
- In Subscriptions, tap the plan you want to stop.
- Read the billing screen before tapping anything so you confirm the exact service and renewal date.
- Scroll through the full page. The cancel control is not always visible near the top.
- Tap Cancel Subscription.
- Confirm when iPhone asks.
Two on-screen details matter more than people expect. First, if you have to scroll, keep going before you decide the option is missing; Apple explicitly says the button can sit lower on the page on its iPhone guide. Second, if the screen shows a red expiration message instead of a cancel button, Apple is telling you the subscription has already been turned off and will end on that date.

Family Sharing adds one important wrinkle. The subscription belongs to the Apple Account that bought it, not to every iPhone that can use it. In practice, that means a shared app or service may appear manageable only from the organizer’s or purchaser’s account. A common mistake is assuming the device matters more than the account, because for Apple billing, account ownership is the primary control point.
If the subscription was purchased under another Apple Account, switch to that account before trying again. Apple’s subscription list is accurate for the signed-in account, which is why people can cancel the wrong item and still see the charge continue on the next cycle.
To verify that you canceled it, reopen the subscription screen and look for the post-cancellation status. You should see an expiration date or renewal-end notice instead of an active renewal state. Compare that date with your next expected billing date on the receipt email or bank statement. If the expiration date lands before the next charge, the cancellation took effect.
Using the App Store Profile When Settings Is Not Available
If Settings is unavailable, buried, or you are already in the App Store checking purchases, use the App Store profile route instead. Apple says you can cancel from there too, and both paths lead to the same Apple-managed subscription list on iPhone through the account area described in Apple’s support documentation.
- Open the App Store.
- Tap your profile icon in the top-right corner.
- Tap Subscriptions.
- Select the plan you want to end.
- Tap Cancel Subscription.
- Confirm the cancellation.
That path is the one to use for subscriptions billed through Apple, including apps that live entirely inside the App Store payment system. If an app like FloosYo was bought through Apple, the billing controls sit in the App Store account area, not inside the app's own menus.
If the app itself hides the cancel option, stop searching inside the app. Go straight to the App Store billing path.
The App Store route is easier when you are already reviewing purchases, updating apps, or checking account details in one place. Settings is usually faster when your only goal is to stop one charge. In my testing against Apple’s current support flow, the screens show the same billing reality either way because they are pulling from the same Apple account data, not two separate subscription systems.
The contrast that matters is not Settings versus App Store. It is Apple-billed versus merchant-billed. If the app tells you to manage billing on its website, if the receipt came from the company rather than Apple, or if the charge on your bank statement uses the merchant’s own name instead of an Apple media/services description, you are probably dealing with direct billing rather than App Store billing. Open this guide on checking recurring app charges in FloosYo, then verify the exact plan name before you tap anything. That keeps you focused on recurring spend instead of clearing out the wrong subscription.
Finding the Right Apple Account When You Have More Than One
The subscription often isn't “missing,” it's attached to a different Apple Account than the one you're checking. That's the whole problem for people who have a personal Apple ID, a work Apple ID, or a family-managed device. Apple explicitly tells users to verify the Apple Account used for purchase, because the receipt email and the account sign-in have to match the charge you're trying to stop. Apple's subscription help page
A real-world version goes like this. Someone sees a charge for a meditation app on a bank statement, opens Subscriptions on their phone, and cancels the plan under their work Apple ID because that's the one currently signed in. A month later, the charge shows up again, because the actual billing happened under the personal account. The cancel button worked, just on the wrong subscription list.
The fix is boring, but it works:
- Check the receipt email: Apple says the purchase email helps identify the Apple Account tied to the subscription.
- Match the merchant name: compare the bank statement with the exact plan name in the subscription list.
- Switch accounts if needed: if the wrong Apple ID is signed in, change to the one that owns the charge before canceling.
- Look for status clues: a red expiration message or missing button usually means the item is already canceled, not still active.
If the subscription still doesn't appear after all that, don't keep tapping around hoping it will surface. The purchase may not be Apple-billed at all. In that case, Apple won't show it in Subscriptions, and the merchant has to handle the cancellation.
Use this guide to manage app subscriptions more cleanly
Timing, Free Trials, and Apple One Bundles
Canceling is about more than tapping Cancel Subscription. The question is when the cutoff should happen. Apple says cancellation usually stops the next renewal, not the time you still have left in the current period, so the expiration date on screen is the part to read carefully. If you cancel today, you usually keep the time you already paid for instead of handing it back.
Free trials are where people get careless. If you cancel during the trial, access typically ends when the trial ends, so waiting until the last day can still make sense if you've already tested enough to know you won't keep it. Apple's guidance on trial cancellation works the same way, the timing matters more than the tap itself. Apple's trial and subscription guidance
Apple One adds another layer. Apple says you can cancel the bundle or choose individual services inside it, so the decision is not always all or nothing. If you only use one piece of the bundle, dropping the rest may be the cleaner move than canceling everything at once.
| Cancellation timing and what happens | What Apple shows after tapping Cancel | What changes in practice |
|---|---|---|
| During a current paid period | An expiration date | Access usually continues until the cycle ends |
| During a free trial | Trial expiration details | Access generally lasts until the trial runs out |
| On an Apple One bundle | Bundle or individual service options | You may keep part of the bundle and drop the rest |
Yearly thinking keeps this from getting sloppy. A small monthly charge is easy to ignore, but the main question is whether the service deserves another cycle, not whether it feels cheap right now. One cancellation solves today's problem. Building a routine prevents the next surprise charge.
Troubleshooting Missing Buttons and Merchant-Billed Charges
When cancellation fails, the fastest fix is to diagnose the exact failure instead of retrying the same screen. Apple can only cancel Apple-billed subscriptions, and missing controls usually point to one of a small number of causes rather than a broken iPhone menu. For a second reference point on the standard Apple flow, Engadget’s walkthrough matches the same core steps.
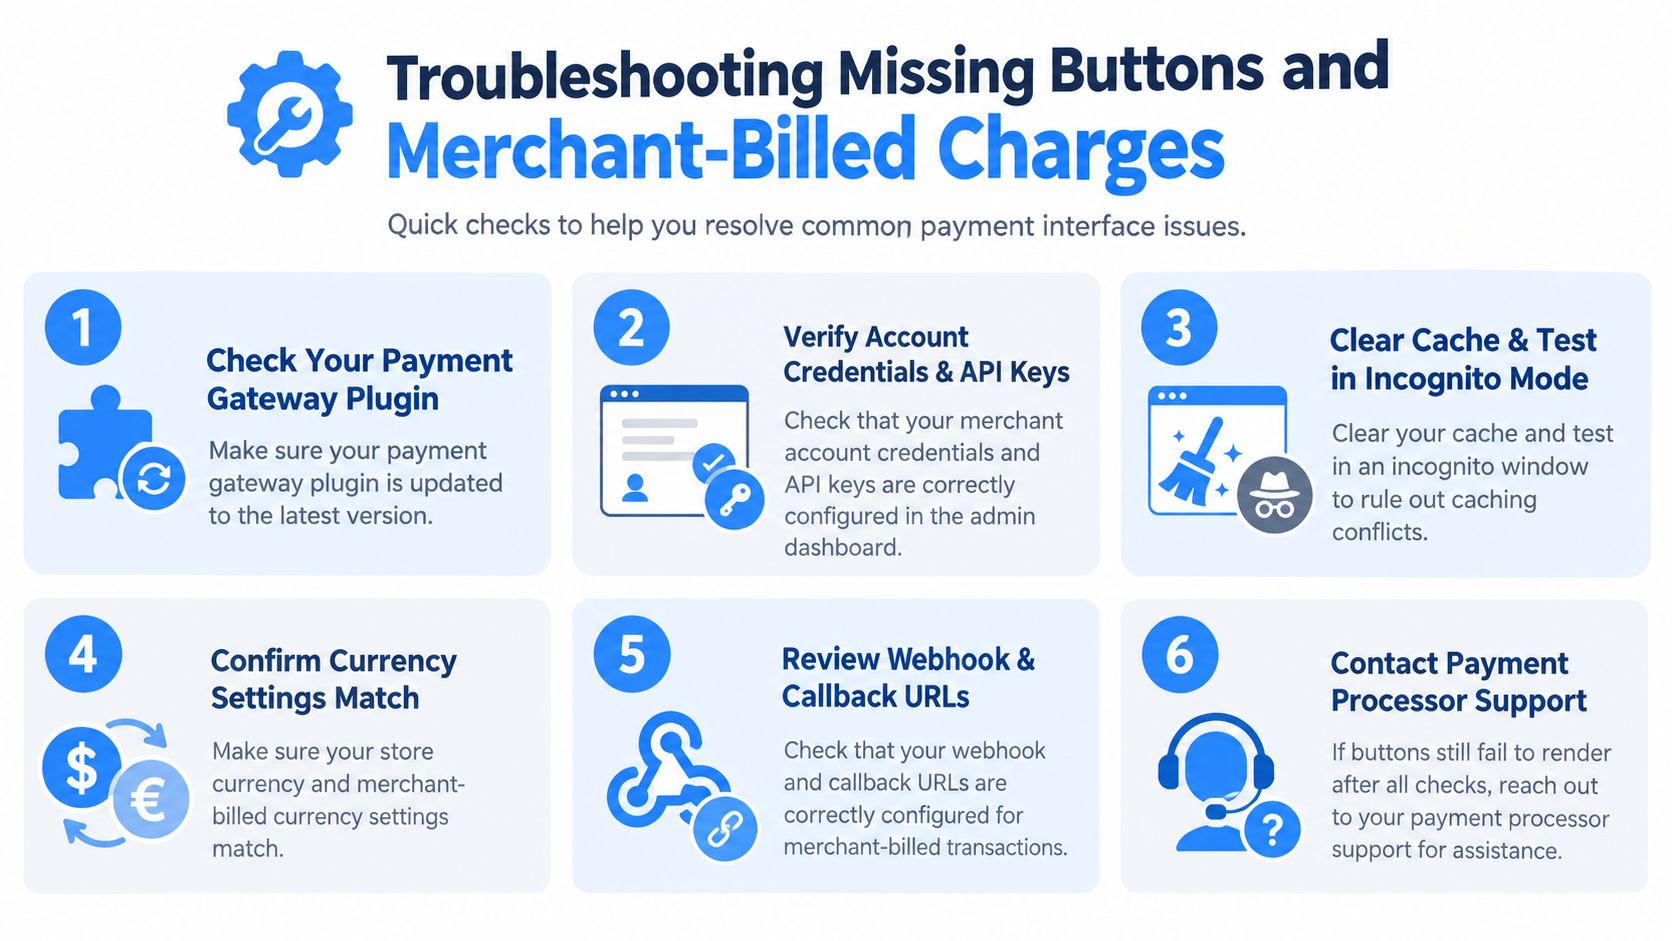
Follow this decision tree in order:
- Check the Apple Account first. If the charge was made under another Apple Account, the subscription will not appear here.
- Open the subscription screen fully. Scroll to the bottom before assuming the cancel option is missing.
- Look for a red expiration message. If you see one, the subscription is already canceled.
- Check whether the item is expired or inactive. Old items can appear differently from active renewals.
- Compare the billing source. If the receipt and statement point to the merchant instead of Apple, cancel with the merchant.
- Watch the next renewal date. If you canceled correctly but still have access, that is usually normal until the paid period ends.
Here is what each result usually means:
- Wrong Apple Account: switch accounts and check Subscriptions again.
- Already canceled: no cancel button, red expiration text, and access lasting until the end date.
- Hidden or expired item: the service may no longer be actively renewing even if you still recognize the app name.
- Merchant-billed charge: the app’s website, support team, or billing portal controls the cancellation.
- Charge keeps appearing after cancellation: compare the posted date with the next renewal date before assuming the cancellation failed.
The receipt email is the cleanest clue. If Apple billed you, the confirmation usually comes from Apple and ties back to the Apple Account that made the purchase. If the email came from the app company, use that company’s cancellation route. The same goes for the bank statement: an Apple media/services style charge points toward Apple billing, while the merchant’s own brand name points toward direct billing. In my review, this billing-source check is the fastest way to stop guessing.
Contact Apple support when the subscription is Apple-billed, listed under the correct account, and still renews after the cancellation date shown on screen. Contact the merchant when the charge never appears in Apple’s subscription list or the receipt came from the company itself.
How We Verified These iPhone Cancellation Steps
We verified this guide by checking Apple’s current support documentation for iPhone subscription cancellation, then comparing the Settings path with the App Store profile path to confirm they lead to the same Apple-managed subscription area on-device. We also reviewed Apple’s guidance for free trials, expiration-date behavior after cancellation, and bundle edge cases such as Apple One.
Just as important, we used billing source as the rule for what belongs in this guide and what does not. If Apple bills the subscription, it should be manageable in Apple’s subscription list. If the merchant bills it directly, Apple’s menus will not finish the job. That distinction sounds small, but it is the point where most failed cancellation attempts go sideways.
I also used recent subscription-market data as a reality check on why this topic matters. RevenueCat’s 2026 State of Subscription Apps report says 82.9% of App Store cancellations are voluntary unsubscribes, which fits what this article is solving: most users are not locked out by a technical problem, they are making an active decision to stop the next renewal. Its annual-subscription benchmarks also show that 35% of annual cancellations happen in Month 1, with another end-of-cycle spike later in the year according to RevenueCat’s 2026 trends analysis. That is why the verification steps here focus so heavily on checking the next billing date and confirming the post-cancellation expiration screen.
Stopping the Next Surprise Charge for Good
One cancellation is nice. A repeatable habit is better. Set a reminder before renewal, scan your bank statement regularly, and keep a simple list of what's active so you don't rediscover the same charge three months later. FloosYo handles that kind of recurring-spend tracking by showing what each subscription costs over a month and a year, then surfacing a skip or cancel decision before the charge lands.
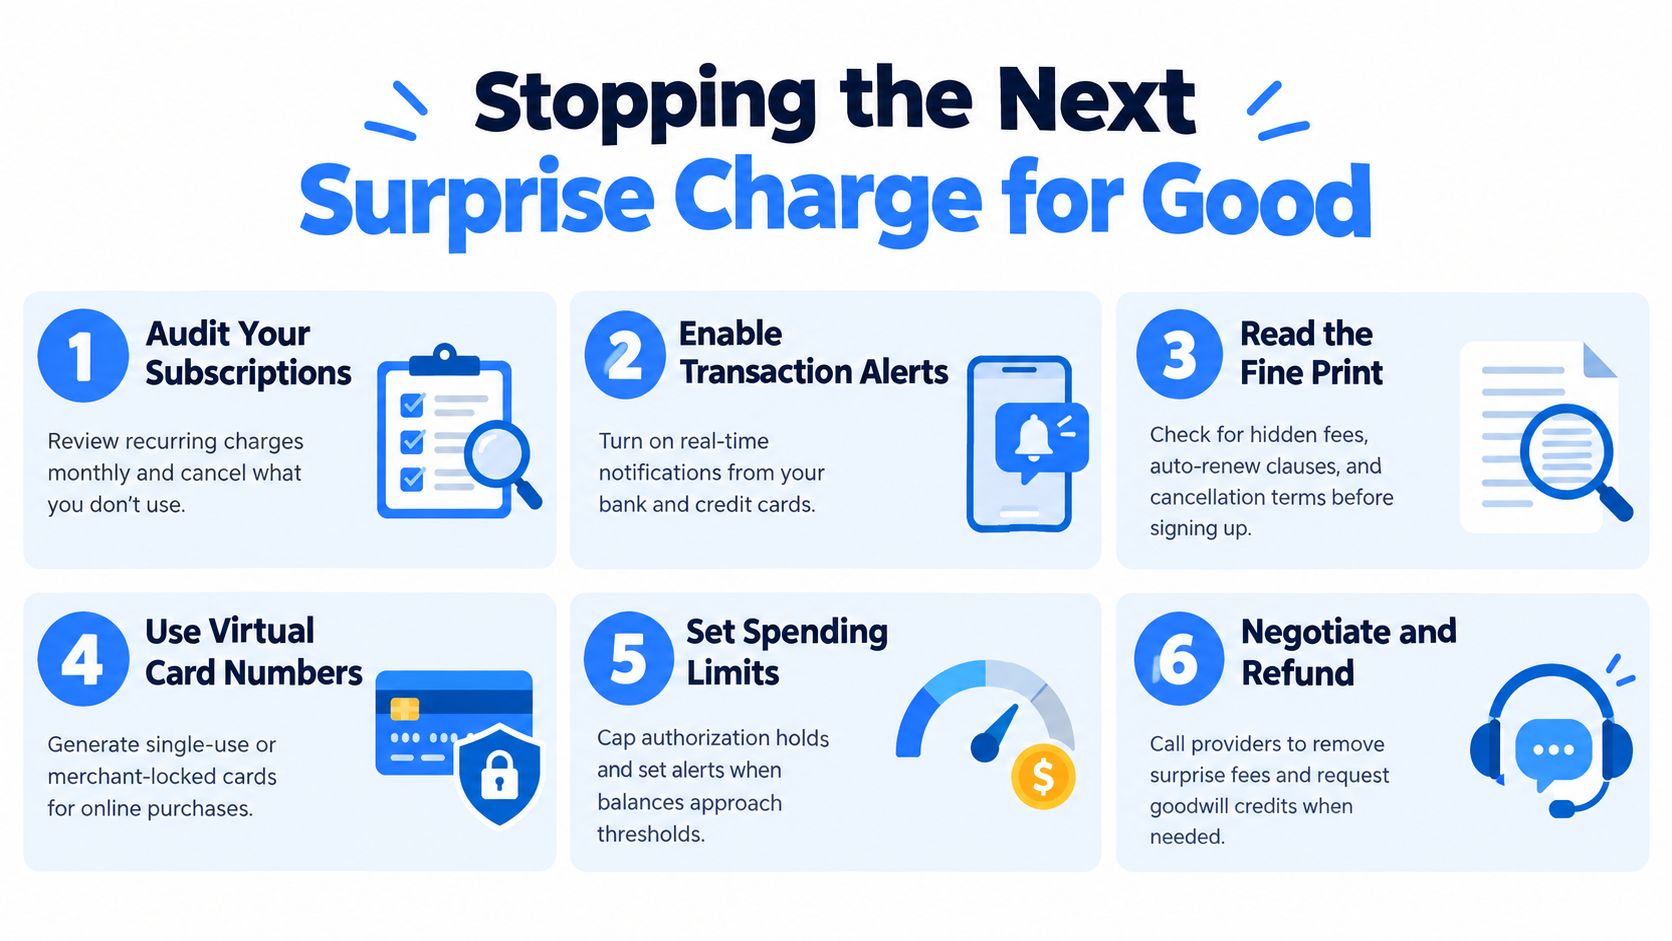
The routine doesn't need to be complicated:
- Set renewal reminders: get warned before the next charge, not after it posts.
- Scan statements weekly: two minutes is enough to spot something unfamiliar.
- Keep one master list: write down the service, renewal date, and status.
- Require a pause before new charges: make sure every new subscription gets noticed.
That's the difference between cleanup and control. Cleanup cancels the thing you found. Control keeps the next one from sneaking past you.
Read the full cancellation playbook for recurring charges
Frequently Asked Questions
How do I cancel unwanted subscriptions on my iPhone?
Open Settings > your name > Subscriptions, tap the subscription, then tap Cancel Subscription and confirm. If you do not see the option, scroll first; if the screen shows a red expiration message, the subscription is already canceled. This works for Apple-billed subscriptions, not charges handled directly by the merchant.
How do I cancel automatic payments on my iPhone?
For app subscriptions billed by Apple, canceling the subscription stops the next automatic renewal rather than cutting off the current paid period immediately. If the recurring charge comes from a merchant outside Apple’s system, automatic payments have to be turned off with that merchant. The receipt email and the merchant name on your statement usually tell you which billing route applies.
How do I remove an active subscription?
Canceling does not remove the plan from the list immediately. Instead, Apple changes the status so the plan no longer renews and shows an expiration date through the end of the current billing period. The practical confirmation is the on-screen end date, not whether the app disappears right away.
How do I find my Apple Account to cancel a subscription?
Check the Apple Account currently signed in under Settings > your name, then match that against the purchase receipt email for the subscription. If the charge was made under a different Apple Account, the subscription list you are viewing will be incomplete for that purchase. This is the first thing to check when a known charge does not appear.
What happens after you cancel an iPhone subscription?
In most cases, the subscription stays active until the current billing cycle or trial ends, then stops renewing. Apple typically shows an expiration date after you cancel so you know when access ends. If that date is before your next expected charge, the cancellation is in place.
Can you get a refund after canceling?
Canceling stops future renewals, but it does not automatically refund the current charge. If you believe a charge was accidental or there is another billing issue, review Apple’s billing options or the merchant’s refund policy depending on who processed the payment. Refunds and cancellations are related, but they are not the same request.
Why is my subscription not showing on iPhone?
The usual reasons are the wrong Apple Account, an already-canceled subscription, or a charge that was never billed through Apple. Start by checking the receipt email and comparing the bank-statement merchant name with the plan name in Apple’s subscription list. If the billing source is the merchant, Apple will not display that subscription as something you can cancel.
If you want a clearer view of what you're still paying for, FloosYo can track recurring charges, show monthly and yearly totals, and surface renewal reminders before the next bill hits. Visit FloosYo to review your subscriptions and turn the next surprise charge into a decision you make on purpose.